
How To Make The Perfect Kona Coffee Pour Over

When it comes to choosing a favorite brew method for Kona Coffee, our go-to is easily the pour over. Simple, consistent, and efficient. This method is one of the best ways to showcase the bright and floral nuances found in premium Kona Coffee. We enjoy the meditative approach a pour over can bring to our morning. Each pour over attempt offers an opportunity to improve and be mindful of the variables required to create the perfect cup.
Equipment needed -
Fresh Roasted Kona Coffee ◦ Kettle ◦ Your Favorite Mug ◦ Pour Over Cone ◦ Pour Over Cone Filter ◦ Coffee Grinder ◦ Kitchen Scale Set to Grams
Heat Your Water

Heat about 470 grams (2 cups or 16oz) of water to 200°F
We recommend filtered water or tap water that is free from any off-flavors. If your water source contains any undesirable flavors, they may show through in the brewed coffee and alter your experience.
Ideally a kettle equipped with a long pour over spout will provide the most control when pouring. The narrow opening will restrict the water flow and make it much easier to slowly add the water in a consistent fashion.
No thermometer, No worries - Bring your water to a rolling boil and allow it to rest for about 30 seconds to bring the temperature down to 200°F. Keep in mind that if the water is too hot it may over extract your coffee leading to a bitter cup.
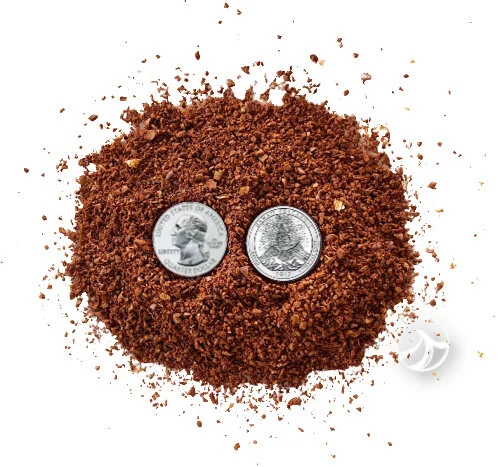
Grind Your Kona Coffee
Grind between 20-25g (4-5 tablespoons) of freshly roasted whole bean Kona Coffee.
We typically recommend a water to coffee ratio of 16:1 for this method. We also recommend using a burr grinder to ensure a consistent grind size. If a burr grinder is not available a blade grinder is still preferable to using pre-ground coffee. If you use a blade grinder however, pay close attention during grinding as it can be easy to under or over grind your coffee.
The ideal grind consistency for a pour over is a piece size similar to course salt. Grind your coffee too fine and the result could be bitter. Grind your coffee too large and you may under-extract leading to a weak cup.
Prepare Your Filter
Place your filter cone on top of you favorite mug and place a paper filter inside the cone. Prepare your filter by wetting with a little water. Once the water has emptied into your mug, discard the water and add your fresh ground Kona Coffee.

This preparation step is optional, but helps to preheat your filter cone as well as remove any unwanted paper fibers prior to adding your ground coffee.
Kona Coffee Bloom

Set your mug and your pour over cone including the wet filter on your kitchen scale set to grams. Make sure to zero your scale. Pour 50 grams of 200°F water ensuring you wet all the ground coffee. This should take about 15 seconds. Once you have wet your ground coffee wait at least 30 seconds and observe the coffee bloom before proceeding to the next step.
No scale, No worries - just pour enough water to make sure all of the ground coffee is wet. Very little water is needed at this stage and shouldn’t add too much to your mug.
This step is the best way to tell just how fresh your Kona Coffee might be. Fresh roasted coffee will slowly release carbon dioxide gas for a few weeks after roasting. This is the reason many coffee bags have a one-way gas release valve. Once the ground coffee is exposed to water, the carbon dioxide will begin to rapidly release and cause bubbles to form. This gas release and expansion is referred to as the “coffee bloom”. The older the coffee, the less carbon dioxide will be released. To ensure the ultimate experience, coffee connoisseurs often look at the bloom step as an indicator of how fresh their coffee might be.
Final Pour
With your scale now reading 50 grams after the 30-second bloom stage, begin pouring an additional 400 grams of water in a slow spiral motion. Try and pour slowly so that it takes about 2 minutes to pour the total 400 grams.
No scale, No worries - Pour your water slowly as indicated above but monitor the amount of coffee entering your mug closely. This may take some practice but try and gauge the amount of water needed by how much room is still left in your mug. It may be handy to have an alternate vessel to place your cone on top of in the event that you poured a little too much water.
If it appears the water is not passing through your cone as expected, your grind size may have been too small and could be clogging the flow. If the water appears to drain through too quickly, the grind size may be too large and could result in a weak and under-extracted cup.

